Jawahar Navodaya Vidyalaya (JNV) Student ID Card Portal: Step by Step Guide
Jawahar Navodaya Vidyalayas (JNVs) are premier institutions under the Navodaya Vidyalaya Samiti (NVS) that offer quality education to students across India, especially in rural and remote areas. As part of its digital initiative, JNV has introduced an online Student ID Card Portal, which simplifies the process of generating, managing, and accessing student ID cards.

In this article, we will provide a detailed guide on the JNV Student ID Card Portal, explaining its features, how to access it, and the benefits it offers to Teachers & Principals .

What is the JNV Student ID Card Portal?
The JNV Student ID Card Portal is an online platform developed by the Navodaya Vidyalaya Samiti (NVS) to provide students with a unique and verified identification card. The ID card is an essential document for students in JNVs, as it serves several purposes:
- Identification: The ID card helps in verifying the student’s identity within the school, during exams, and at various events.
- Library Access: Students use their ID cards to borrow books and access resources in the school library.
- Official Record: The ID card acts as an official record that links the student to the specific Jawahar Navodaya Vidyalaya they belong to.
- Verification for Examinations: The card is used for examination purposes to ensure that the student is registered and eligible for the exams.
The portal streamlines the process of issuing these ID cards by allowing students, parents, and school authorities to easily manage and update the details associated with the student’s ID.
How to Access the JNV Student ID Card Portal
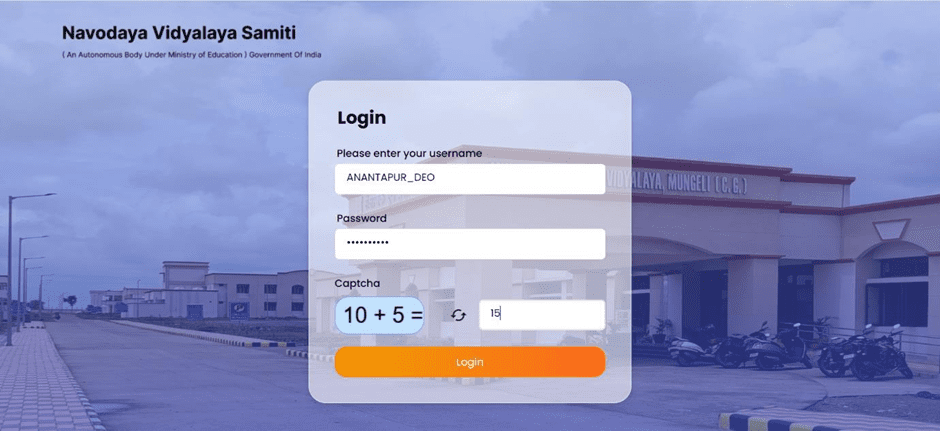
o access the NVS ID application, follow these steps:
- Enter the URL: Open your browser and enter the following URL:
- Enter Credentials: Input the username and password provided by the system administrator.
- Login: After entering the correct username and password, click the Login button to access the application.
The following screen will appear after successful login:
Figure 1: Login Screen

After successful login, the Dashboard will appear. The dashboard will provide an overview of student-related information for the school.
- The dashboard will display:
- Total Strength of Students
- Student Registration Count
- Pending Registration Count
These details will be updated dynamically as data entry begins.

Figure 2: Dashboard Overview
The management section allows the user (DEO) to perform various tasks related to the organization of student records.
School Class Mapping
To map the school classes and enter student strengths:

- Click on the Management tab in the menu.
- Select School Class Mapping.

Figure 3: Management Menu
The School Class Mapping page will open where DEO can enter class-wise student strength details.
- Search: Click on the Search button to view the grid of available classes.
- Enter Strength: Select the checkboxes for the classes you wish to update. Enter the number of students in each respective class.
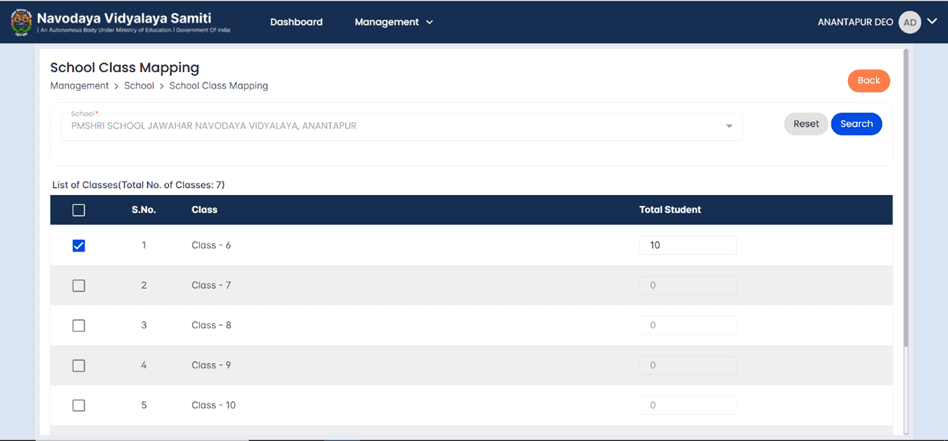
Figure 4: School Class Mapping Page
- After entering the student strength for each class, click Save to store the data.
Figure 5: Entering Class Strength Details

5.2. Student Setup
To enter individual student details:
- Click on the Student Setup option under the Management tab.
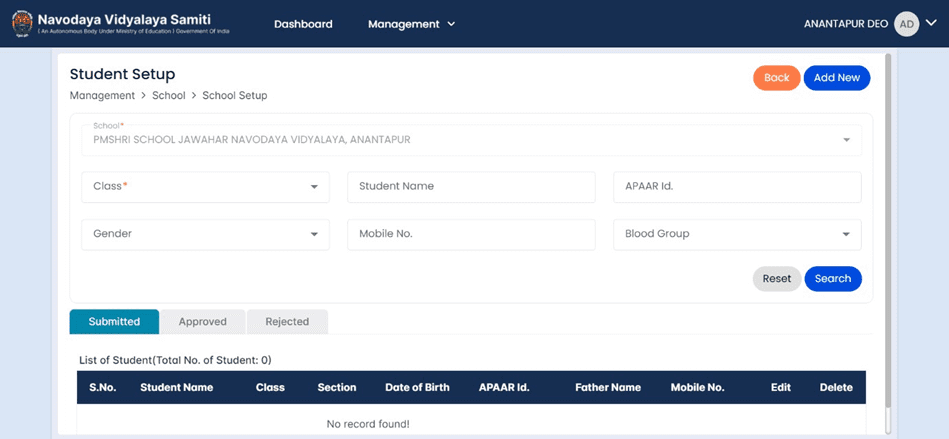
Figure 3: Student Setup Menu
The Student Setup page will allow DEOs to input details for each student. The page is divided into three sections:

- Submitted: Displays entries done by the DEO.
- Approved: Shows entries that have been approved by the school principal.
- Rejected: Displays entries rejected by the principal.
To add a new student:

- Click the Add New button on the page.
Figure 7: Adding New Student
- Fill in all the required student details, upload a photograph of the student, and click Save to submit the information.
Figure 6: Student Entry Form
5.3. Bulk Student Import
For bulk data entry, the Student Import option allows users to upload multiple student records at once.

Figure 8: Student Import Page
- Click on Student Import under the Management tab.
- Download Excel Template.
- Fill the All Details of students
- student information for the Generation of ID Cards for the upcoming Academic Year 2025-26. Here are the key points:
- Date of Birth (DOB) format: dd/mm/yyyy
- Class Teachers of 2024-25 will fill in the data for students promoted to the next class in 2025-26, based on school records.
- Certain fields (APAAR ID, School Registration No, and Status Date) are not mandatory.
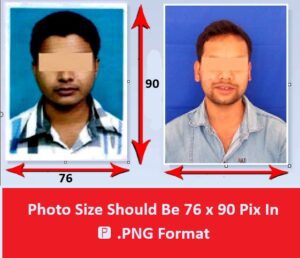
🚹 🚺 Photo Size Should Be 76 x 90 Pix In 🅿️ .PNG Format
GO to Student Setup
Select class
Entre Student Name :
Search students
Click on edit button for upload photo

UPLOAD Photo Size Should Be 76 x 90 Pix In 🅿️ .PNG Format

DOWNLOAD
Navodaya Vidyalaya Samiti Student ID Card Template 2025-26 EXCLE FILE
- संसदीय राजभाषा समिति निरीक्षण प्रश्नावली

- Yoga Wellness Trainer – HSS/Q4003 |PMKVY 4.0 SKILL COURSE

- YOGA INSTRUCTOR BWS/Q2201 COURSE

Student Approval (School Principal)
Once the DEO has entered the student records, it is the responsibility of the Principal to verify, approve, or reject the entries.
Steps for Principal:
- Login: The school principal should log in to the application using their provided credentials.
- Access Student Approval: After logging in, go to the Dashboard and click on Management > Student Approval.
Figure 10: Student Approval Menu
- Verify & Approve/Reject: The principal can view all submitted student entries. After reviewing the data, the principal has the option to approve or reject individual records.
Once approved, the student details will be considered finalized and updated in the system.
USER MANUAL ID CARD